Using Adobe Acrobat Pro on Windows to Print Posters
This page assumes you have logged into one of the G.R.I.D. Lab computers that are running Windows and have opened your poster in the Adobe Acrobat Pro program. You may see this program listed in the Start menu as simply "Adobe Acrobat". Do not use Adobe Acrobat Reader. There are separate instructions for poster printing from Adobe Acrobat Pro DC on macOS.
This page will show you how to set the color matching, page size, orientation, scaling, and other essential printer options and then print the poster from Acrobat Pro.
On each screenshot, the only items that you must check or modify are outlined in red. All other items were left at default values during our testing. You are "on your own" if you change anything else.
The basic workflow is to open the File->Print menu; select the desired poster printer; set the custom page size; select "application managed" color matching in the operating system print driver; modify margin handling if desired; verify the print orientation and scaling; select the color matching ICC profile in Acrobat Pro; and then send your print job to the printer.
After printing, you must use the appropriate G.R.I.D. printer release form to release your print from the print queue so it can actually print.
Start by selecting the Print item from the File menu in Acrobat Pro. This will bring up the Acrobat Pro Print dialog box as shown in the screenshot selection below. The items outlined in red must be checked or changed in the order shown, as described in detail below.

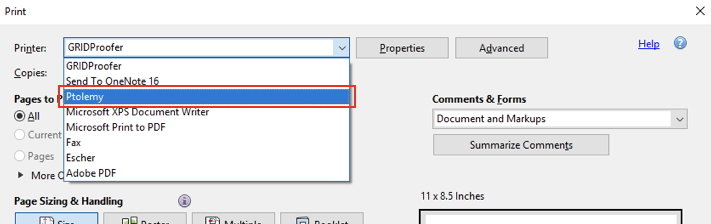
1) Set desired printer
GRIDProofer is always the default printer in this lab. That's because it is the simple and cheap laser printer. From the drop-down menu at the top of the Print dialog box, change this to either Escher or Ptolemy, as shown in this screenshot selection.
2) Setup your custom page size
The default page size is always 8.5 by 11 inches. You can see that page size listed above the preview image. You must set a custom page size large enough to fit your poster!
Start by clicking the Properties button in the top center of the Acrobat Pro Print dialog box, as shown in this screenshot selection.

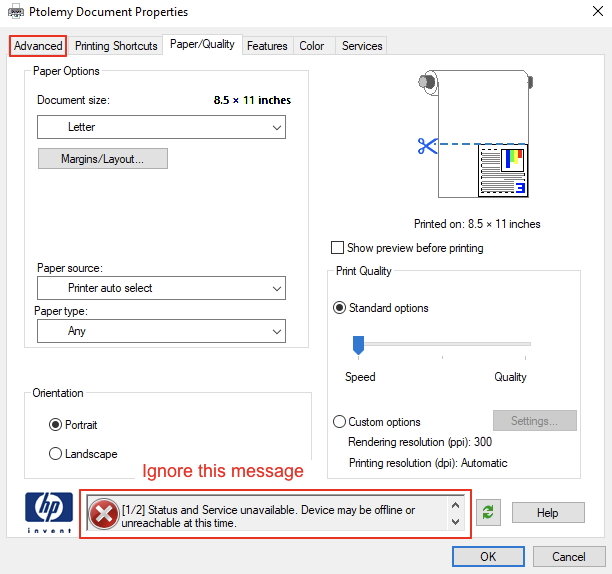
This will bring up the normal Windows print driver Document Properties dialog box with multiple tabs. The Paper/Quality tab is initially selected, as shown in this screenshot selection. Ignore the warning message at the bottom of this and subsequent dialog boxes. Windows thinks it should be able to talk to the printer directly.
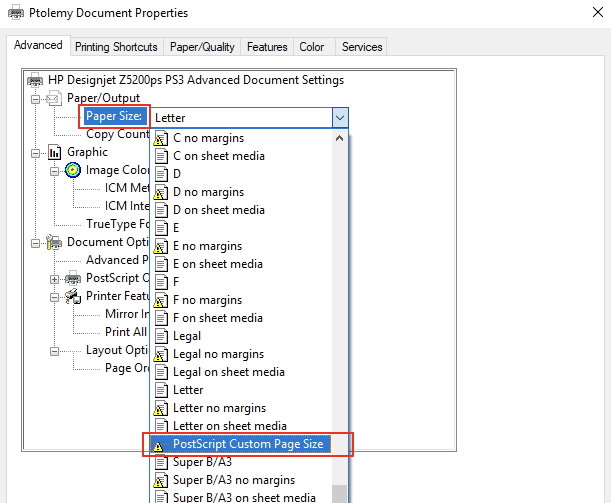
You cannot set the custom page size you will need on this Paper/Quality tab. Only predefined page sizes are available here. Instead, click on the Advanced tab in the upper left corner, as shown on the screenshot selection above. This changes the display to show a set of drop-down menus for special features. Click on the Paper Size drop-down menu and scroll down to select the PostScript Custom Page Size item, as shown on this screenshot selection.
This will open up the PostScript Custom Page Size Definition dialog box with a default size of 8.5 by 11 inches pre-defined, as shown in this screenshot selection. Minimum and maximum values that the printer supports for width and height are shown in parentheses next to the width and height fields. Note that maximum values in the G.R.I.D. lab are less: we only keep 42 inch wide paper on these printers that comes in 100 foot (1200 inch) long rolls.

Replace these default letter size values with the paper size needed for your poster.
The "width" value is the length along the cut edge of the printer roll and cannot exceed 42 inches. The "height" value is the length along the roll feed dimension and can be any length (up to 1200 inches maximum per normal new roll of paper!).
This may not match your intuition! You may think of the long dimension of your landscape poster as the "width". But if it is longer than 42 inches, you must treat it as the "height" and then let Acrobat Pro rotate your print.
By default, sizes are entered in inches, but you can select millimeters or points (72 per inch) as your measurement unit with the checkboxes on the right.
Here is a screenshot selection showing my final values in the PostScript Custom Page Size Definition dialog box for a sample custom size of 40 inches wide by 12 inches high.

Click on the OK button to save your new custom page size. Unlike MacOS, your custom page size is not saved in your profile and cannot be reused for more prints. You have to set it each time you send a print.
When you click the OK button, Windows may present this error message, especially if your poster has a very short height (so the default feed "Short Edge First" would waste paper).
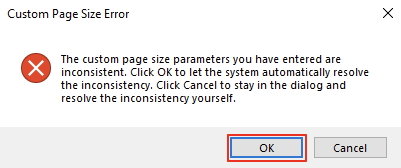
Click the OK button to continue.
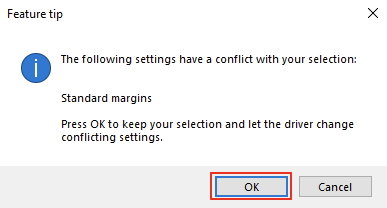
In almost every case, Windows will present another error message regarding default margins. Again, click on the OK button to continue, as shown in this screenshot selection.
3) Set color matching in the operating system print driver
You will get awful colors unless you set a consistent color matching option in the operating system print driver (this step) and in Adobe Acrobat Pro color management (step 7, below). Without forcing the settings to match, first Acrobat Pro will adjust the colors as it thinks would print best, and then the operating system will adjust them again - differently.
You have two options for color management:
- Let the application (Acrobat Pro) manage the colors. With this option, you tell Acrobat Pro where to find the correct color profile for the printer. Then, using its knowledge of the original color space for each element that was created or imported into the poster, plus the profile for how the printer colors actually look on paper, Acrobat Pro will adjust the color values of the pixels to match on the print as closely as possible with how they look on the screen. Acrobat Pro will send these pixels to the printer with instructions to print them "as is" with no further changes. We recommend this option and it is described in these instructions.
Calibration with a spectrophotometer can be used to create a profile of how specific combinations of printer inks and paper actually represent colors. The Escher and Ptolemy printers each have a built-in spectrophotometer. We have used it to create International Color Consortium (ICC) color profiles for each printer on the standard paper that we use in the lab. Selecting the correct profile allows Acrobat Pro to more accurately represent the colors in your poster when printing. - Let the printer manage the colors. With this option, the printer takes the colors in your document that it receives and adjusts them according to a generic, less accurate, profile for that model printer. If the application does not include the original color profile that describes the print, this conversion will be even less accurate. We do not recommend this option and do not describe how to set it. If you wish to use color matching in the printer, you still must force the same setting in both the print driver and Acrobat Pro, so you still have to complete both steps 3 and 7 of these instructions.
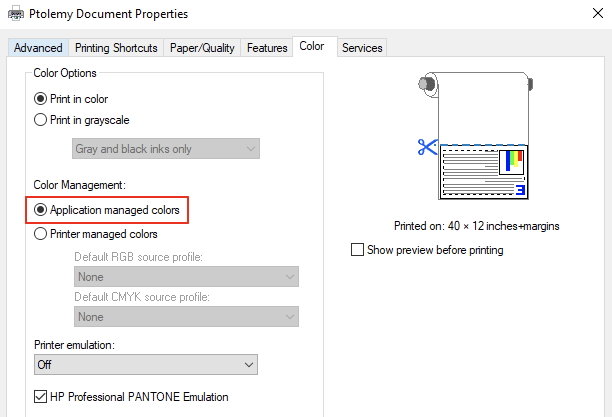
In the previous step, you set the custom page size and were then left in the Advanced tab of the Windows print driver Document Properties dialog box. Now click the Color tab, as shown in this screenshot selection.

The Windows print driver Color Management options are in the left center of the Document Properties Color tab display. By default, the Printer managed colors option is typically selected. Instead, click on the Application Managed colors option, as shown in this screenshot selection.
4) Optionally, change margin handling
Before you click the OK button to leave the Windows print driver Document Properties dialog box that you opened to set the custom page size and operating system color matching setting in steps 2 and 3, above, consider whether you want to change print margin handling. It is also changed from this dialog box.
Both Escher and Ptolemy want to put an unprinted white margin of approximately 5 mm (nearly one-fourth inch) on all sides of your printed image. It may slightly shrink your actual image to accomodate this margin if you are trying to print to the full width of the paper.
There are two cases where this default margin handling is not suitable for you, because you really don't want your full-width poster content slightly shrunk with a narrow white margin added:
- Your poster has a short dimension of 42 inches and an exact scale that you want to maintain (for example, a field map).
- Your poster has a short dimension of 42 inches and content or background colors that extend right to the very edge.
If your poster falls into one of the two categories above, read on to find out how you can change the default margin handling to get your poster printed exactly as you intended. In all other cases, you can skip this step and go on to set the print orientation.
Here's the problem. The printer really wants to include that narrow unprinted white margin. The printer always has extra paper for this margin along the long dimension because it can just unroll more paper. The short dimension that is placed along the 42 inch cut edge can be a problem. If your poster page size is set to use that entire 42 inch width, the printer will slightly shrink your poster image to make room on the paper for the margin. But you can change this behavior, as described below.
If your image size has a short dimension smaller than the actual width of the paper roll, you can avoid shrinkage by specifying a "paper size" that is just the size of your image (and thus less than the 42 inch paper width). Then the printer has extra paper to work along the short dimension where it can add its margin. So it makes no change to your actual poster image and you can just trim down the output paper to remove the extra margins. In this case, you don't need to change any settings and can skip to set the print orientation.
The problem comes when the short dimension of your image is exactly the 42 inch width of the paper roll. By default, the printer still wants approximately one-fourth inch on each side for a white margin, so it will slightly scale down your image to be approximately 41.5 inches wide. This is about a 1% reduction. Does this matter to you? In many cases, it does not. If you don't need an absolutely exact scale on the final poster, and if you have white margins built into the poster anyway, you probably won't even notice that your margins are slightly larger and the actual content slightly shrunk. In that case, again, you can leave the margin handling at its default setting and skip this step.
Here's how to handle the cases where you don't want the printer to shrink your image to fit its narrow white margins. At this point, you should still have the Windows print driver Document Properties dialog box open from completing step 3, above. Now click on the Paper/Quality tab, as shown in this screenshot selection.

In this display of general Paper and Quality options, click on the Margins/Layout button in the upper left, as shown in this screenshot selection.

This will display the margin handling options. The default mode which slightly shrinks a 42 inch wide poster to fit the white margins is labelled Oversize, as shown in this screenshot selection.
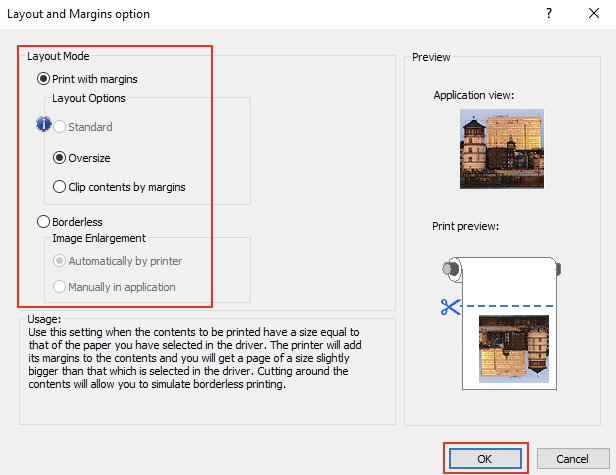
If your 42 inch wide poster was designed with white margins anyway of at least one-fourth inch, then your simplest solution to prevent slight shrinkage is to leave the Print with margins button selected, but change the method in the drop-down menu below it to Clip contents by margins, as shown in the screenshot selection below.

In this mode, the printer will effectively use your existing white margins to satisfy its need for a margin and print your poster with no shrinkage. If your poster image has content or background color all the way to the edge, this Clip contents by margins setting will replace your content with a white margin in the last 5 mm around the edges. But it will not shrink your image.
In the case where your 42 inch wide poster has no built-in margin, but instead, has content or background colors all the way to the edge, what you really want is borderless printing. Except you can't get true borderless printing of your exact image on these printers. Because the printer is concerned about paper misalignment leading to a thin white line on the edge, if you request borderless printing, the printer will slightly enlarge your poster image first so it effectively bleeds over the edges by 2 to 4 mm. This will result in a slight loss of content along the very edge. You have to decide if this slight enlargement with content bleeding off the edge is better or worse than the other options above, which either scale down your poster to accomodate the white margin, or replace 5 mm of content along the very edge with a white margin. If you prefer the enlargment with bleeding, click on the Borderless button in this Layout and Margins option dialog box.
Finally, click the OK button on the bottom of the Layout and Margins option dialog box to save your selection and return to the normal Windows print driver Document Properties dialog box.
5) Set print orientation
When you are done with setting the custom page size, setting the printer driver color matching, and adjusting the margin handling options from steps 2, 3, and 4, above, that are set from the Windows print driver Document Properties dialog box, click the big OK button on the bottom right of this dialog box to save your Windows print driver settings and then return you to the normal Acrobat Pro Print dialog box, where you can continue with the remaining steps.
Now that you have defined and selected your custom page size, make sure the Orientation: Auto portrait/landscape button is clicked in the Acrobat Pro Print dialog box so Acrobat Pro can automatically rotate your print file to fit the page size definition as needed, as shown in this screenshot selection.
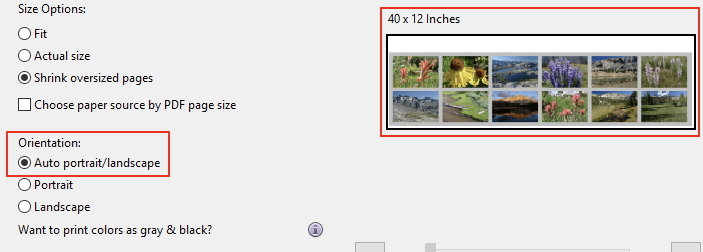
In the screenshot selection above, you can see the correct custom page size above the print preview on the right, and the poster is correctly oriented within that preview. If the size is not correct, go back to step 2 to fix it. Auto-orientation always seems to work correctly, but you can also click the Portrait or Landscape buttons to force a particular orientation.
6) Set scaling option, if desired
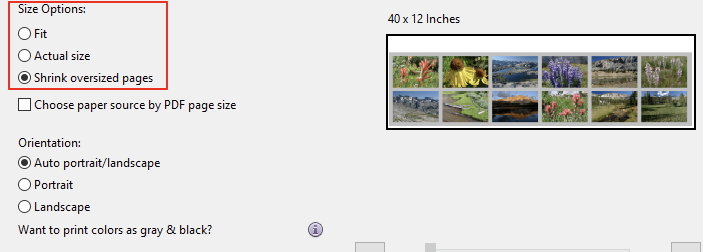
Acrobat Pro can scale your print as needed to fit the page size you have defined. The normal option is to "Shrink oversized pages" before printing. If your poster doesn't seem to fill the custom page size in the preview, the Size Options: section in the left of the Print dialog box gives you other options, as shown in this screenshot selection. The most useful option is Fit, which will either enlarge or reduce your image to just fit within the page size you have defined.
Warning: if your poster was made to a size that is significantly smaller than the paper size you have defined, "scaling up" the print may create significant "pixelation" that will look bad. In that case, remake the poster to the correct final paper size.
If you have an exactly scaled map or drawing, you should change the Size Options: to Actual size and be sure to set Clip contents by margins in the margin handling step, above. These options will avoid slight scaling changes by either Acrobat Pro or the operating system. If the print doesn't fit within your page size after switching to Actual size, go back to step 2 to fix the page size.
7) Force Acrobat Pro color matching to be the same as the print driver and select ICC profile
You must tell Acrobat Pro to use the same color matching settings (application or printer) as you selected for the operating system driver in step 3, above. Otherwise, you will get badly distorted colors as Acrobat Pro and the operating system each do something different to adjust the colors. As explained in step 3, these instructions recommend that you let Acrobat Pro handle the color matching using a custom ICC color profile created specifically for each printer in the lab. That is described below.
Start by clicking the Advanced button in the top right of the Acrobat Pro Print dialog box, as shown on this screenshot selection.
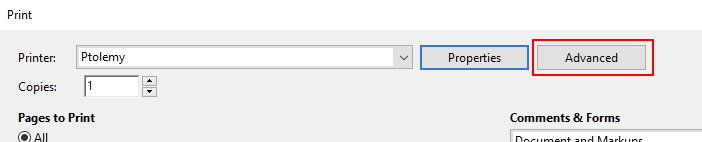
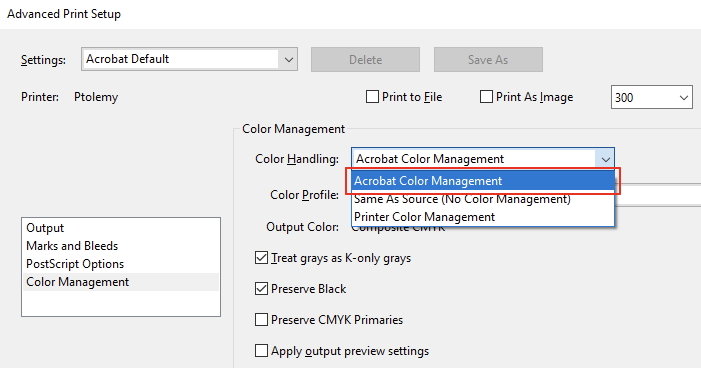
This brings up the Acrobat Pro Advanced Print Setup dialog box, which initially shows output options as shown in this screenshot selection.
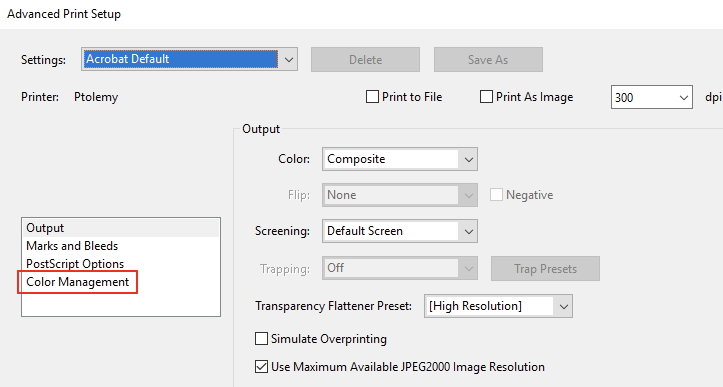
Click on the Color Management option on the left side of the dialog box. That switches the dialog box to a set of color management options. First, make sure that the Acrobat Color Management item is selected from the Color Handling drop-down menu at the top of this section, as shown in this screenshot selection.
Now use the Color Profile drop-down menu to find and select the profile named HP Designjet Z5200, Ptolemy HP Universal Heavyweight Coated if using the Ptolemy printer or "HP DesignJet Z6, HP Universal Heavyweight Coated Paper, Best" for the Escher2 printer. You will have to scroll down the list to find this profile, as shown in this screenshot selection.
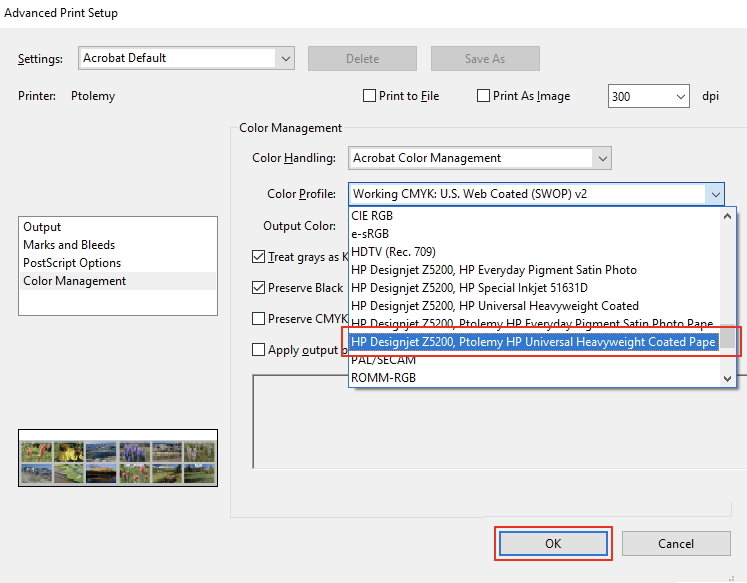
Finally, click the OK button on the bottom right of this Advanced Print Setup dialog box to return to the main Acrobat Pro Print dialog box.
8) Final preview check
At this point, you should have the color matching, paper size, print orientation, and scaling correctly set for your print. Check the preview image once more to make sure that your print is fitting the paper size correctly.
9) Send your print job
Clicking the Print button in the lower right corner of the Acrobat Pro Print dialog box sends the print job to the printer.